Wednesday, May 15, 2019

Moar Pizza - and greens

So, I'm a big fan of pizza.  Also a big fan of anything that uses up the greens.  So both were on display in this recipe from Smitten Kitchen for Crispy Spinach Pizza.  Modifications I made:
  • I used my usual pizza dough from Bittmann.
  • I didn't have fresh mozzarella so I made do with the shredded stuff in the bag.
  • I used 2 oz less of the mozzarella.
  • I sliced the garlic, poured a Tbs of olive oil over and microwaved it for 30 sec, fished it out to put on the pizza dough.
  • I cooked the pizza for 5 minutes on parchment, then pulled it out to finish.  
Yes, it looks like we "melted Oscar the Grouch" on a pizza, but it still tastes pretty darn good.

 Some pics!
Pull the stems off the spinach:


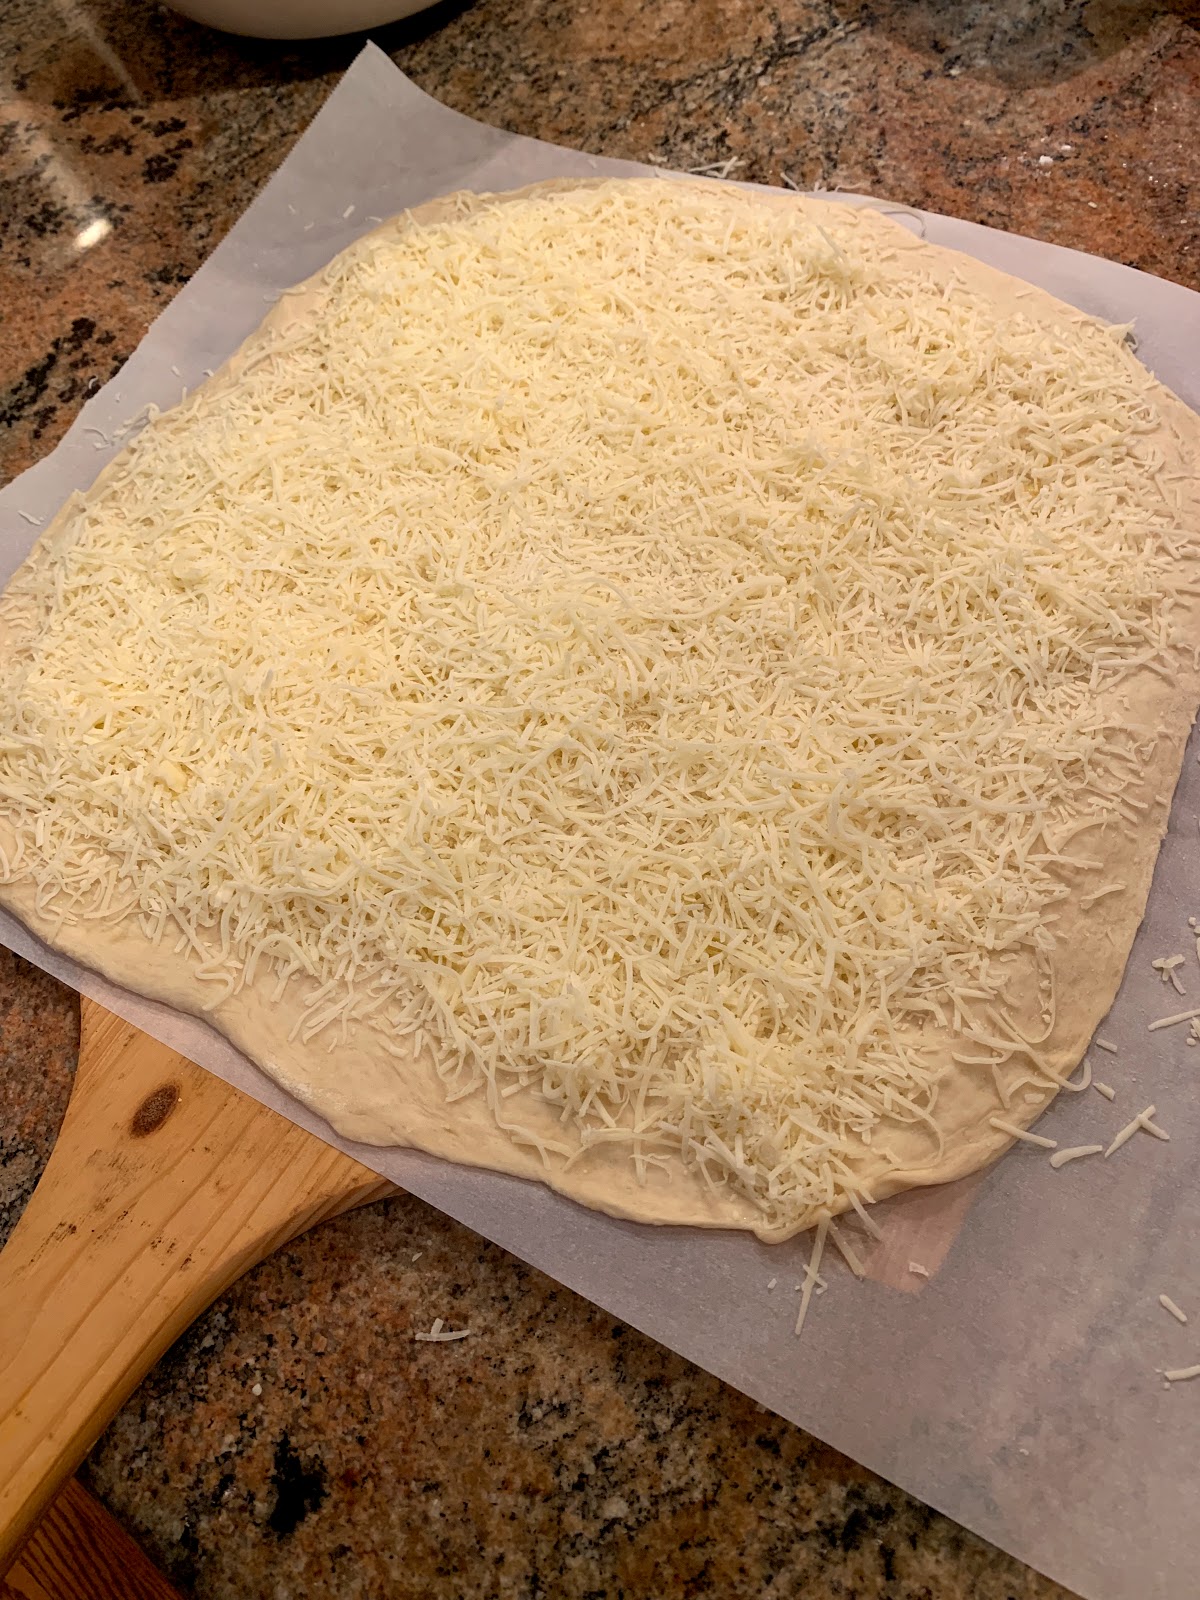
The dough with all the cheeses:
Pile up the spinach:
Melted Oscar:
Tasty!

Monday, May 13, 2019

Sunday, May 12, 2019

It's not easy being green...

Ok, so we were not fooling around this week with the greens.  A reminder of what we're dealing with here:
It's like >5 lbs of greens!  Two of the pounds were salad mix and something labeled "stir fry mix"
I dropped a handful of these in some scrambled eggs yesterday, but was looking for some other ways to use them up as...well, there is a LOT.  The internet provided (eventually) as I found this recipe on the NY Times website for Provencal Greens Soup, and I thought a soup that described the greens ingredient as "...wild greens that you might forage on an afternoon’s walk, such as nettles, watercress and dandelion greens." would fit the bill nicely for these guys - don't they look like something you'd gather during a walk in southern France?
So, a couple of leeks in hand, I set off to make the soup.  A few changes I made were to use 4-cups of chicken broth that I had in our malfunctioning 2-month old freezer in the garage that I needed to empty (yes, I'm bitter) as well as add a parmesan rind as suggested in the comment on the recipe.  There were many, many other suggestions in the comments, as well as a general feeling that tempering eggs is harder than it sounds.  At any rate, I thought it was tasty, and I used about 3/4 of the greens!  Yay!  (I probably could have squeezed all of them in)

Provencal Greens Soup (adapted from the New York Times)

Ingredients:
  1. 1 tablespoon extra virgin olive oil
  2. 2 leeks, sliced in half lengthwise and sliced thinly crosswise, then washed and drained. (I used leeks that were about 1" in diameter, and only the white and light green parts).
  3. 4 garlic cloves, sliced
  4. Kosher salt
  5. 6 cups chopped greens. I didn't measure this very carefully, I filled up a bowl (see pic below) w/ about 5-6 large handfuls, then put them on the cutting board and ran a knife through them a few times to chop. 
  6. 4 cups chicken stock
  7. 2 cups water  
  8. parmesan rind
  9. Black pepper to taste
  10. 2 large eggs
  11. Slices of good bread (whatever is good to you - I used some pane di casa from the Teeter, any "sturdy" bread will do. If I'd realized I'd be making this I'd have bought some bread at the Curb Market yesterday.) 
  12. 1 clove garlic cut in half
  13. Additional grated parmesan for serving.
What to do:
  1. Heat up the olive oil in a heavy pot over medium heat, add the leeks and saute 5 minutes until tender. Add the garlic and about 1/2 teaspoon salt, and cook about 1 minute until the garlic is fragrant.  Add the greens and stir until they wilt a bit.  Add the water and stock and parmesan rind, and bring the mixture to a boil and reduce to a simmer.  Simmer partially covered for 15-20 minutes until the greens are tender.  Add more salt and pepper to taste.
  2.  Beat the eggs. While whisking the eggs, drizzle in 1-2 ladles (about a cup or two) of the hot soup.  Whisk the egg soup mixture back into the rest of the soup.  This is "tempering" and is supposed to avoid scrambled egg soup.  If they scramble, don't panic, call it egg drop soup with greens and move on with your life.
  3. To serve:  Toast a slice of bread (brush with olive oil if you like).  Rub the toast w/ a cut clove of garlic.  Chop toast into bite sized chunks and put in the soup bowl.  Ladle soup over.  Grate some parmesan on top.  You can skip the bread if you like.
Some pics!  Your mise:
Sauteing the leeks:
Adding the greens and simmering:
Soup's on!

And, while I'm playing with my phone, here's the strawberry shortcake we had for Mother's Day lunch dessert.  Strawberries from Rudd Farm, biscuits (shortcake) from Smitten Kitchen, and ice cream from last week's barbecue for our seniors.  And hey, the biscuits are too easy, you don't even need a sifter, just whisk all the dry ingredients together and add the cream.


Friday, May 10, 2019

Spring CSA 2019!

Aaaand we're back!
Yes, it's time for another 22 (!) weeks of produce from the Guilford College Farm (need to update the subtitle of this blog).  School is out for the spring semester (Congratulations Class of 2019!) and the campus is beautiful and green and so is this box of produce:
What do we have?  Well, starting on the lower right and moving counter clockwise
  • 1 lb "stir fry mix" a mix of greens that will be best in a quick saute with rice or eggs
  • 1/2 lb spinach
  • 1 lb salad mix
  • 1 bunch rainbow chard
  • 1 lb mustard greens
  • 1 head lettuce
  • 1 bunch kale
  • and in the middle next to the rainbow chard stems, 1 pint microgreens (radish sprouts)
So dinner will have something green in it tonight, just don't know what yet! (and so will every breakfast, lunch and dinner for the next few days!)


Monday, November 26, 2018

Thanksgiving side: sweet potato casserole!

There's one thing I can't have Thanksgiving without, and that's my family's sweet potato casserole.  You can tell I've made it a lot just by looking  the page in the cookbook it's on:
This is from "Heritage of Hospitality" which is a Junior League of Winston-Salem Cookbook from 1975.  I think it might be the first cookbook I ever owned.  My mom was one of the editors, and I remember her testing recipes and also piles and piles of these bright yellow cookbooks with green binding all over our house.  The sweet potato casserole is one of two recipes she had in the cookbook - another is for a grilled leg of lamb that I still use. Somewhere I think I have the original recipe card that my grandmama wrote it down on.   I've modified her recipe a bit, and I always rant at Thanksgiving that I never know how much "6 or 7" sweet potatoes are.  Especially when this is what I've got to work with:
I think it ended up being about 6 lbs, but that seems like too much. You need enough mashed sweet potato to fill a 9"x13" casserole dish.  I also bake the sweet potatoes rather than boil them.

Here's the recipe typed out:
Sweet potato casserole
Casserole filling:
6 or 7 sweet potatoes
1/2 stick butter (4 tbs)
2 eggs
1/2 cup brown sugar
1/4 cup half and half
cinnamon, nutmeg and vanilla to taste (I usually add about 1/4-1/2 tsp cinnamon, 1/4 tsp nutmeg and 1/2 tsp vanilla - I think I forgot the vanilla this year).  I also added some salt  - maybe about 1/4 tsp?

Topping:
1 cup crushed cornflakes
1/2 cup brown sugar
1/4 cup chopped pecans
1/2 stick butter, melted

Directions:
 Preaheat oven to 350 and spray casserole with non-stick spray.

Wash sweet potatoes well, prick all over with fork to let steam escape and place on baking sheet.  Bake at 350°F until tender (fork slides in easily), about 1 hour.  Let cool enough to handle and peel.  Place warm potatoes in mixer and stir with paddle attachment to mash (you could also mash by hand).  Add butter, eggs (I usually beat the eggs a bit before I add them), brown sugar and half and half.  Mix well.   Season to taste and spread potato mixture in casserole.  You can cover at this point and refrigerate overnight.

When you're ready to bake the casserole, mix together the dry topping ingredients and then add the butter. Spread evenly over the top of the potato mixture.  If the casserole is warm, bake in a 450 oven for 15 minutes until heated through and the topping is browned.  If baking from the refrigerator, I usually turn the oven down to 350 and let it bake until heated through and the topping is browned, maybe 20-30 min?  Keep an eye on it.  Sorry this is vague but you're usually heating this up while you're waiting for the turkey to rest and finishing up all the other bits and pieces of Thanksgiving dinner so the goal is just to get it hot and not burn it.  It's pretty forgiving.  I'm much more likely to burn the rolls than this!

The potatoes going into the oven:
The finished product:

We have finally grown into the amount of food we make at Thanksgiving, thanks to these guys:

Edited to add in 2021 I used 7.5 lbs sweet potatoes and filled the casserole above (13x9 pyrex) and a 9x9 square casserole as well (maybe not as generously but I think a thinner layer is good).  So I think 6 lbs for the 13x9 would do, and 2-3 lbs for a 9x9.

Wednesday, November 21, 2018

Sunday, October 21, 2018

Sauerkraut!

Really, who doesn't love sauerkraut?  Ok, well, a lot of folks, honestly. Including me, until I was in graduate school in Texas.  Not that I'd ever really had sauerkraut before.  But the part of Texas that Texas A&M is in has a huge German and Czech community, so your sausages and fermented cabbage products abound.  (As do kolaches, which are awesome, but do not involve sauerkraut.)  There was a local brand that was sold in the refrigerated section in the grocery stores that completely changed my mind, and all brats are naked without it.  That was quite some time ago, so I can't even begin to remember the name of it!

After moving out of Texas, my interactions with sauerkraut were relatively limited - I'd occasionally buy a bag or jar in the refrigerated section of the market, but that was it.  Four years ago, I taught a First Year Seminar class called "Food:Science, Transformation and Culture".  I used as a base text the book "Cooked" by Michael Pollan, and in the chapter entitled "Earth" he discusses making sauerkraut - specifically way too much of it using a crock and many pounds of cabbage.  I had my students that semester make kim chi and sauerkraut, adapting this recipe for "Small Batch Sauerkraut" from the website kitchn.com that makes a little less than a quart.


For each 2 qt mason jar (I usually halve this for a 1 qt jar)
1 medium head green cabbage (about 3 lbs)
1 ½ tbs kosher salt (or 1 tbs pickling salt) - (better to measure about 2-2.5% by weight of cabbage)
1 ½ tsp caraway seeds (can add other flavorings - I left these out)
1.         Clean everything, including your hands!
2.         Slice the cabbage – cut into quarters and trim core.  Slice each quarter into halves lengthwise.  Slice each wedge crosswise into very thin ribbons
3.         Transfer cabbage to a gallon freezer Ziploc and sprinkle salt over.  Seal the bag and start working the salt into the cabbage by squeezing and massaging the cabbage through the bag with your hands.  Gradually the cabbage will become watery and limp, about 5-10 minutes.  Add the caraway seeds now if you like.
4.         Pack handfuls of cabbage into the jar, every so often pack down the cabbage.  Pour any liquid released by the cabbage while you were massaging it into the jar. 
5.         Weigh the cabbage down w/ a small plastic bag of pie weights or marbles to keep it submerged below the brine.
6.         Cover the jar w/ a piece of doubled cheesecloth and secure w/ a rubber band.
7.         Press the cabbage down every few hours.
8.         Add extra liquid if needed; after 24 hours, if the liquid is not above the cabbage, dissolve 1 tsp salt in 1 cup water and add just enough to submerge the cabbage.
9.         Ferment the cabbage for 3 to 10 days: As it’s fermenting, keep the sauerkraut away from direct sunlight and at a cool room temp, ideally 65-75°F.  Check daily and press down if the cabbage if floating above the liquid.  Start tasting after 3 days, when it tastes good to you, remove the weight and screw on the cap, and refrigerate. You can also allow the sauerkraut to continue fermenting for 10 days or even longer. There's no hard and fast rule for when the sauerkraut is "done" — go by how it tastes.  While it's fermenting, you may see bubbles coming through the cabbage, foam on the top, or white scum. These are all signs of a healthy, happy fermentation process. The scum can be skimmed off the top either during fermentation or before refrigerating. If you see any mold, skim it off immediately and make sure your cabbage is fully submerged; don't eat moldy parts close to the surface, but the rest of the sauerkraut is fine.
10.       Store sauerkraut for several months: This sauerkraut is a fermented product so it will keep for at least two months and often longer if kept refrigerated. As long as it still tastes and smells good to eat, it will be. If you like, you can transfer the sauerkraut to a smaller container for longer storage.
 Chopping the cabbage:
 Packed into the bag with salt:
After 10 minutes of massaging and squeezing, packing it into a jar:
Plenty of brine!
Keeping the cabbage submerged for a few days w/ a ziploc filled w/ dried beans:
A few days later, you can see the bubbles as it ferments:

I let it go for about 7-8 days, tasting every couple of days until it got to the level of sauer I like.  Then pop the lid on and put it in the fridge and it'll keep pretty much forever.