Showing posts with label garlic. Show all posts

Sunday, June 14, 2020

I've made a few things..

What have I made over the past few weeks?
Here's the week 5 basket:
What all did we get?
  • carrots
  • beets (I've got to do something with all of these I'm accumulating!)
  • kale
  • fennel bulb w/ fronds
  • rainbow chard
  • cucumbers
  • garlic scapes
  • two heads lettuce (hidden under the fennel)
  • a tomato!
The week 6 basket I forgot to take a picture of, but the Guilford College Farm posted one on Instagram so here's a link.  You should follow them @guilford_college_farm on the 'gram.  What was in it?
  • carrots
  • beets (I have a problem here)
  • fennel bulb (the fronds were not quite as nice on this one so I tossed them
  • collard greens
  • cucumbers
  • garlic scapes
  • two heads lettuce
  • pt cherry tomatoes (several types)
  • 2 tomatoes!
 So there are some salads, gazpacho and beets (roasted and pickled) my future.

A few things I've made recently, from least complicated to most:

Grilled Garlic Scapes
Put garlic scapes in a 1 gallon ziplock bag (you may need to cut them in half).  Add a bit of olive oil, salt and pepper to taste and shake/massage the bag until the scapes are evenly coated.  Grill 5-10 minutes until a bit charred.  Serve as a side (like asaparagus) or how ever you like.
Tzatziki (cucumber yogurt sauce)

Ingredients:
  • Cucumber, shredded and squeezed dry in a clean dish towel)
  • Greek yogurt (I usually use 2%)
  • 1small garlic clove, pressed
  • 1-2 tsp lemon juice
  • salt and pepper to taste
 Peel the cucumber (or not, I usually don't) and shred using the coarse holes on a box grater.  Pile cucumber in a clean dish towel, wrap up and squeeze to get out as much moisture as possible.  Place cucumber in bowl, and add greek yogurt to roughly equal the amount of cucumber (this is usually about 1/2 - 1 cup cucumber to 1/2-1 cup yogurt).  Stir to mix.  Press a clove of garlic into the mixture (or grate it in w/ a microplane).  Add 1-2 tsp of lemon juice, mix.  Season with salt and pepper to taste.

Hey, remember that head of red cabbage from a few weeks ago?  I finally got around to doing something with it!
Crispy Braised Chicken Thighs with Cabbage and Bacon (adapted from Serious Eats)
Ingredients:
    2 pounds bone-in, skin-on chicken thighs (4 thighs; 1.15kg)
    Kosher salt and freshly ground black pepper
    4 ounces chopped pancetta
    1 medium onion, thinly sliced (about 6 ounces; 170g)
    1 pound finely shredded cabbage (about 1 medium head; 450g - I used red cabbage here)
    2 tablespoons (30ml) whole grain mustard
    1/2 cup (120ml) apple cider vinegar
    3 cups (700ml) homemade or store-bought low-sodium chicken stock
    3 tablespoons sugar
    2 bay leaves
    6 sprigs thyme
One of the ways I adapted this was to substitute pancetta for the bacon called for, and to use less of it. I also didn't use any of the oil or butter called for, because between the pancetta and the chicken there is plenty of fat in this dish.

Directions
  1.  Pre-heat oven to 350°F
  2. Season chicken with salt and pepper, set aside (even better if you can do it the day before)
  3. In a 5 qt cast iron dutch oven, heat 1/2 cup water and pancetta over medium heat.  As water evaporates, fat will render.  Cook until pancetta is browned (about 5-10 min?).  Remove pancetta from pan w/ a slotted spoon, leaving fat behind.  Remove (pour or spoon out) fat until there is only 1-2 tbs remaining in the pan. 
  4. Place chicken skin side down in the pan. Cook without moving about 8 minutes until skin is crisp (reduce heat if it starts smoking).  Flip over chicken and brown on opposite side, about 3 minutes.  Remove chicken to a large platter or plate and set aside.
  5.  Add onion to pan and cook about 4 minutes, until softened and starting to brown.  Add cabbage to pan and cook about 4 minutes, until softened and starting to brown.  Add mustard and vinegar and cook, stirring and scraping up browned bits from bottom of pan. Add chicken stock, sugar, bay leaves, browned pancetta and thyme sprigs and bring to a simmer.
  6. Nestle chicken back into the pan, leaving the skin above the liquid but submerging most of the meat. Transfer pan to oven and cook, uncovered, until chicken is totally tender and liquid has reduced by about half, about 45 minutes.
  7. Remove from oven and transfer chicken to a serving platter. Season cabbage mixture to taste with salt and pepper. Serve immediately, spooning cabbage and sauce into shallow bowls and topping with chicken.

    I also served this with some mashed potatoes to soak up the juices.  Some pics!

    The browned pancetta
    Cooking the chicken

    Cooking the onions


    Cooking the cabbage


    Ready to go in the oven

    All done

    Plated up!


Sunday, April 12, 2020

Happy Easter!

On Easter I like to make lamb.  I'd really like to make some amazing Enno Farms lamb, but this year we had to make do w/ a boneless leg of lamb from Harris Teeter.

For lamb, I adapt a recipe my mom made for many years - it was published in the "Heritage of Hospitality" cookbook, a Junior League cookbook published in 1975 and the first cookbook I ever owned:

The things that I keep the same: the amount of red wine.  Everything else, I amp up.  Two cloves of garlic?  No-  three or four!  1/8 teaspoon herbs?  No, handfuls of chopped fresh herbs, what ever you've got, but hopefully rosemary, oregano and thyme. 1/2 tsp worchestershire - what even is that?  A few glugs from the bottle.  A tbs or two of olive oil, not 1/2 cup.  I don't know why 1970's cookbooks were so afraid of spices  - and earlier ones - you can find recipes for spaghetti sauce in 1950's cookbooks that call for 1/8 teaspoon dried basil - you might as well just think about basil while you are making the sauce.

To cook, I light a chimney of charcoal and let it get white hot, pour it out on one side of the grill and cook the lamb leg over it until it's browned on both sides (about 5-10  min stop when it starts flaring up) then move it over to the cool side of the grill and cook until a thermometer tells me it's about 125°F in the thickest parts. Take off and let rest.

To serve with it I make this chimichurri from Serious Eats (I add 1/2 the amount of olive oil and whiz everything up in the blender or food processor).  I also make this potatoes gratin from Food52 (I use 2% milk and salted butter, it's fine) and finally grill up some asparagus tossed in olive oil, salt and pepper because it's the season.


Happy Easter!

Tuesday, August 13, 2019

Enchiladas Verdes w/ homemade salsa verde

Last week we got tomatillos in the box, and I've had jalapeños from the last two boxes, so it was time to make some salsa verde and enchiladas verdes.

The Enchiladas Verdes recipe is adapted from a Cooking Light recipe from 1999.  It's also great w/ leftover rotisserie chicken and a jar of your favorite tomatillo salsa instead making your own.  It's easy to put together ahead of time, and makes good leftovers.

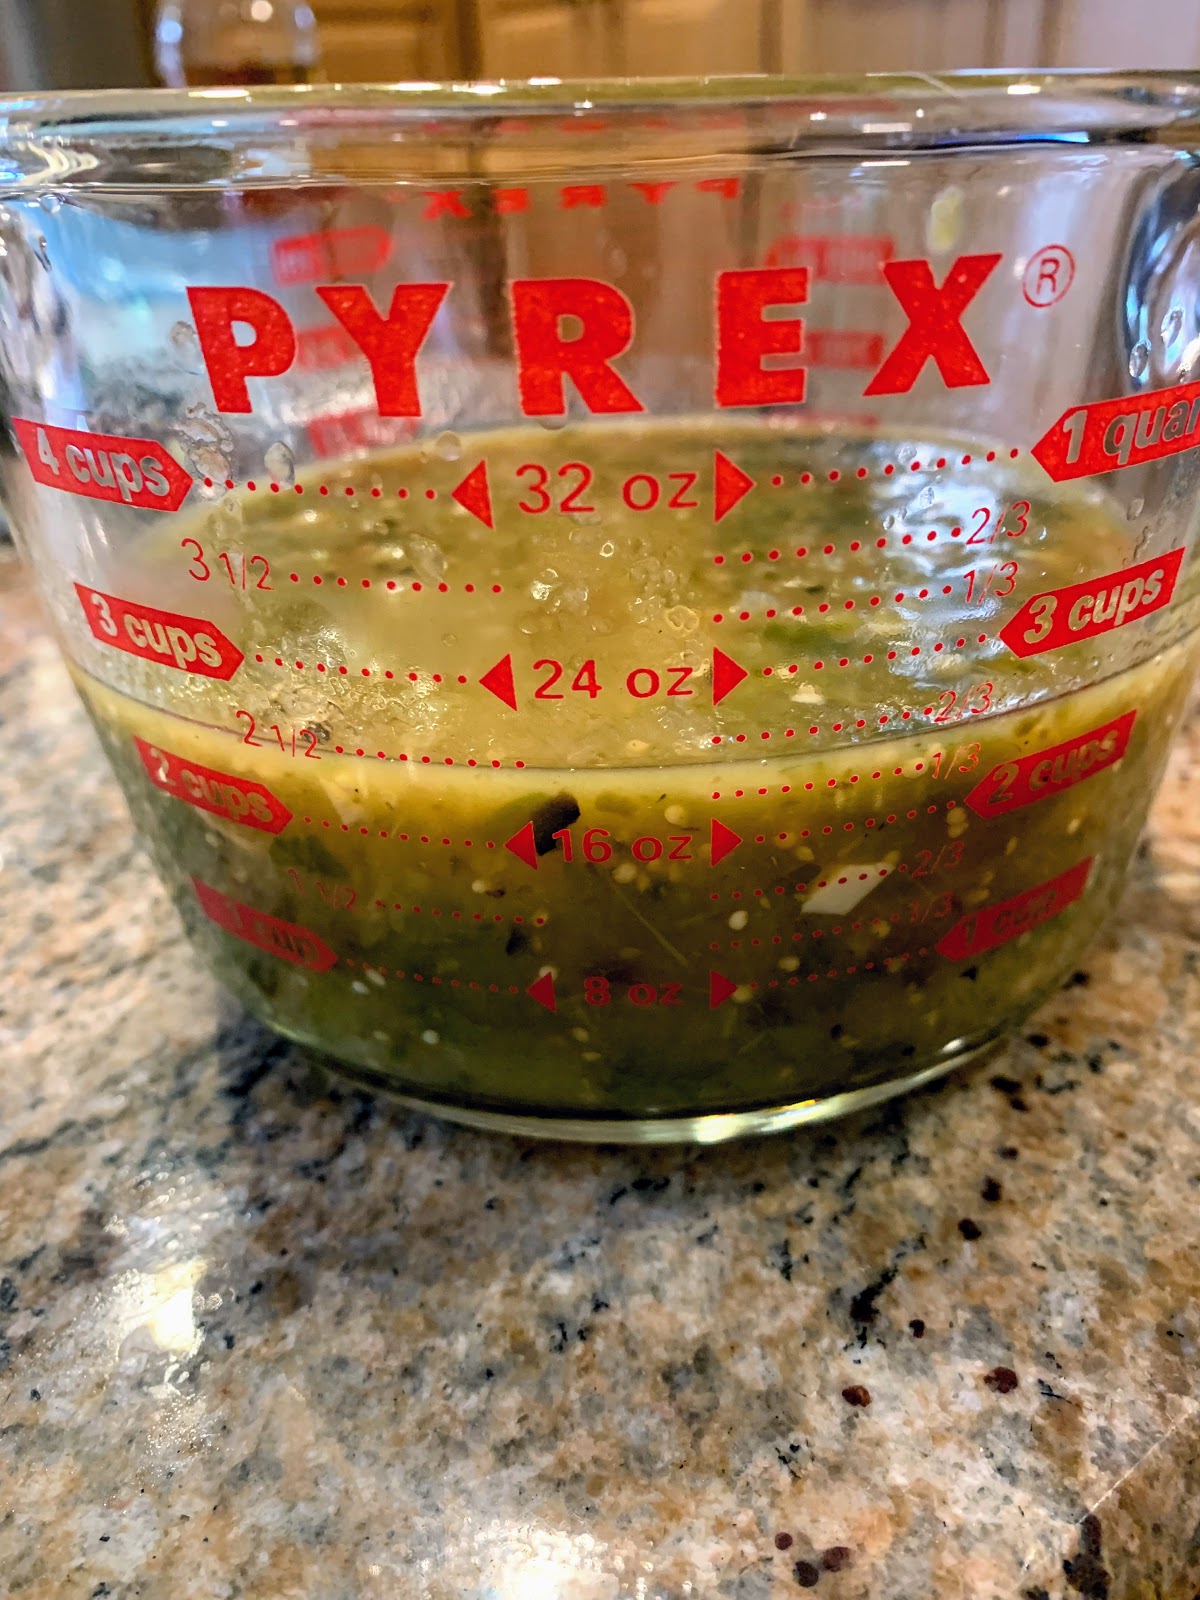
The salsa base is from Rick Bayless' Mexican Kitchen, and I've written about another tomatillo salsa from the same book here.  This is a simmered sauce, and one he recommends for enchiladas.  I made a double batch and froze half for enchiladas later (because I might have still had tomatillos from last week's CSA box).

Essential Simmered Tomatillo-Serrano Sauce (CSA ingredients are marked w/ an *)


*1 pound tomatillos, husked and rinsed
*Fresh serrano chiles to taste (3, 1/2 oz total - I ended up subbing two of the jalepeños from the CSA, they weighed about 1 oz and I took the seeds out of one of them after roasting.
1 tbs olive oil
1 medium yellow onion (6 oz) roughly chopped
*2 large garlic cloves, peeled and roughly chopped
2 cups chicken stock (you could probably sub water here to make it vegetarian, but we're making chicken enchiladas so...)
1/3 cup roughly chopped cilantro.

1.  Lay the tomatillos and chiles on a baking sheet and broil about 4" from the broiler for about 5 minutes a side.  The tomatillos and chiles should start to soften and blacken.  Transfer the vegetables and any accumulated juices to a blender or food processor.

2.  Heat 1/2 tbs of the olive oil in a 5 qt dutch oven over medium heat.  Add the onion and cook, stirring often, until deep golden, about 8 minutes. Add the garlic and cook and stir a minute longer.  Scrape the mixture into the blender or food processor. If your using a blender, take out the "stopper" in the cover and cover loosely w/ a kitchen towel while blending to prevent a massive cleanup of your kitchen becoming necessary.  Pulse the whatever your using a few times to reduce the vegetables to a rough puree.

3. Add 1/2 tbs of oil to the pot and heat over medium high.  When it's hot enough to sizzle when a drop of puree is placed in it, pour all of the puree in and stir constantly for 4 or 5 minutes.   The sauce base will reduce and become thicker and darker.  Stirr in the broth, return to a boil, reduce the heat to medium and simmer briskly until thick enough to coat the back of spoon, about 10 minutes.  Stir in cilantro and season to taste w/ salt.

Some pics!
The vegetables ready for their tan:

In the blender:

The "rough puree"

Final product, ready to go in the fridge to wait for enchilada assembly:

Enchiladas Verdes Adapted from Cooking Light

  1. 12 oz shredded cooked chicken (I usually use white meat, but whatever you like)
  2. 2 oz shredded asiago or asadero cheese (you could also substitute mexican shredded cheese blend if you can't find those)
  3. 1/3 cup finely chopped onion 
  4. 1/3 cup finely chopped cilantro
  5. 1/3 cup chicken broth (If I'm fancy and have planned ahead, homemade, butI will use bullion here, or Better than Bullion) 
  6. 1/3 cup low fat sour cream or greek yogurt
  7. 1 tbs fresh lime juice
  8. 1/2 tsp ground cumin
  9. 1/4 tsp salt
  10. 1/8 tsp black pepper
  11. 8-10 small corn tortillas
  12. 2 cups tomatillo salsa (a jar is fine if you don't want to mess with homemade, Harris Teeter has a good one)
  13. 1 oz shredded asiago or asadero cheese
  • Mix together the first 10 ingredients to make the filling.
  • Spray a 9"x13" baking dish with cooking spray,  and pour 1/2 cup salsa in the bottom and tilt to coast the bottom of the dish.
  • Heat each tortilla in a skillet or on a comal (I heat mine over a gas flame to get a little char), place the tortilla on a small plate, and scoop 1/3 cup filling down the middle of the tortilla, roll up and place seam side down.  Repeat w/ remaining tortillas until you run out of filling.
  • Pour remaining salsa over enchiladas.  
  • Sprinkle w/ remaining 1 oz cheese, cover w/ foil and bake at 400°F until thoroughly heated, about 20-30 minutes.

Some pics!
All the ingredients for the filling (some of the red onion from the CSA here!)
 Salsa in the dish

First enchilada off the assembly line
All enchilada-ed!

Time for dinner


Sunday, August 4, 2019

Homemade Bacon (who knew?)

My friend Marlene emailed me a couple of weeks ago w/ a link to this NY Times article (along with several others) asking "...want to try homemade bacon?"   I had several pork bellies in the freezer because of Marlene (she thought they were ribs from Ofuskee Farm, but they were bellies) and she also had pork bellies from PTB Farms (who I've mentioned before).  We each made up our own cure, riffing off of the NY Times recipe (I left out the coriander, thyme and fennel because they didn't seem like very "baconlike" ingredients to me) and several others from around the web.  Here's what I used:

Cure:
  • 2.5 Tbs kosher salt (Diamond Crystal)
  • 1/2 tsp pink salt (note: this is not himalayan pink salt!  It's pink salt w/ sodium nitrite for curing meats!)
  • 2 Tbs maple syrup
  • 2 Tbs honey
  • 2 Tbs cold black coffee
  • 2 garlic cloves, smashed (CSA ingredient, so it's legit to have bacon on the blog)
  • 1 Tbs black peppercorns, crushed (put them in a ziploc and hit 'em w/ a meat mallet a few times)
  • 2-2.5 lbs pork belly (I had 3 tiny bellies, ranging in size about 10-12 oz) 

 Instructions:
  1. Place the pork bellies in a Ziploc bag.
  2. Mix together the dry cure ingredients, add to bag
  3. Add wet cure ingredients, close the bag
  4. Massage the bag to coat the bellies with the cure ingredients as best you can
  5. Press most of the air out of the bag and place bag in fridge
  6. Flip the bag over and massage the cure into the meat 1x day for 7 days
  7. After 7 days, remove the bellies from the bag, and rinse the cure off of the meat.  Pat dry with paper towels, and place on a rack in the fridge to dry for 6-24 hours.
  8. Since my bellies were so small, I rolled and tied them at this point
  9. Smoke over applewood at 200-225°F for 1.5-2 hours until internal temperature is 150°F
Some before pics:
Ready to go into the smoker

Coming out of the smoker (we also had probe thermometers in two of the bellies while smoking so we knew when to pull them).

mmm...bacon


You could slice and eat it just like this, but we pan fried a few slices and then put some on parchment and stuck it in a 400°F oven to bake 8-12 minutes, keeping an eye on it and flipping it about every 3-5 minutes. 


Forgot to take an after pic.  Combined with Marlene's homemade sourdough sandwich bread, these gorgeous tomatoes from the CSA and some smoked corn mayonnaise from Deep Run Roots, it made some damn fine BLT's.  (which would also be damn fine w/ some Hellman's or Duke's and any good white sandwich bread).


Saturday, August 3, 2019

What to do with eggplant? Pasta Sauce!

So last year we were inundated with eggplant. I think there was a research project that the farm was doing w/ NC A&T.  This year it's not been so much, but still, the eggplant and tomatoes are in full force right now.  I've definitely figured out a few things to do w/ eggplant which you can find if  you click the "eggplant" label over there -->

But I wanted to try something new, so I searched "eggplant" on https://smittenkitchen.com, and Deb, per usual did not disappoint.  She had many recipes for eggplant, but this recipe for Rigatoni and Eggplant Puree really got my attention, since I had eggplant AND a pint of cherry tomatoes in this weeks (and last week's) CSA.

I made it pretty much as described.  The only big difference was that I only made 6 oz of  pasta (it was just the two of us) and used half the sauce it made, and I only used  4 tbs of oilve oil instead of 6.  I also added 6 of these Turkey Meatballs from Trader Joes, thawed and cut into quarters.  The puree is definitely not photo-worthy, but it was pretty tasty overall!
Some pics!
The ingredients! (full disclosure, the eggplants were from last week)
Getting the roasted veg into the food processor:
This was a little tricky b/c the Al foil I'd put on the baking sheet had a hole and the juices from the veg had welded the foil to the sheet.  It all worked out.

Mixing up the sauce with the rigatoni.  Needed 2-3 scoops of pasta water to loosen it up.
Plated up with a little parm and basil garnish...
Oh, and Rudy was jealous b/c Dudley got featured in the last post, so here he is:


Panzanella

There are a million recipes for this bread and tomato salad, and here's how I do it:

Serving size 1, multiply as needed
Ingredients
  • 1-2 good tomatoes, chopped
  • salt and pepper 
  • 1-1/2 clove garlic, grated or pressed
  • good handful fresh basil leaves, chiffonade
  • 1 tsp extra virgin olive oil
  • 1-2 tsp balsamic or red wine vinegar
  • 1-2 thick slices (1-1.5 oz) of good bread, cubed and toasted
  • olive oil cooking spray
  • 2-3 oz fresh mozzarella, cubed
  • 1-2 tsp toasted pine nuts 
  • optional: grated parmesan

Directions:
  • Put chopped tomatoes and their juices in a bowl, add garlic, and salt and pepper to taste.  Add olive oil and vinegar.  Let sit a few minutes to draw out more juice from the tomatoes.
  • Cube the bread, spread on baking sheet, spray lightly with olive oil and toast in toaster oven until golden brown.  Let cool.  
  • Add mozzarella and basil to tomato mixture.
  • Add toasted bread to tomato mixture, tossing until the bread soaks up all the juices
  • Garnish with pine nuts and parmesan (if you remember, I did not in the bowl pictured below)
  • eat! 


Sunday, July 21, 2019

Pan con Tomate

We are in high tomato season here at the CSA.  This week's box had a pint of cherry tomatoes and 2 pounds of regular tomatoes.  And, since I also have a friend's CSA because she is out of town, that means I've got 4 pounds of tomatoes!
Obviously that means that there are BLT's, fresh tomato pasta and gazpacho in my future.  I also used one of the tomatoes to make a quick snack that I learned about in Spain, Pan con Tomate.  I think this is supposed to be a tapa, but every morning at the hotel breakfast in Spain there was a bowl of tomato pulp so you could have it for breakfast.  I used this recipe, more or less as written (but with just one tomato and a few slices of bread since it was just me), and forgot to take pics.  One change I made: I used Italian bread from Cheesecakes by Alex (I've explained how good bread comes from a cheesecake place here)

There's a lot of arguments in the comments about how to make the dish and who it belongs to (it's Catalonian, not Spanish), but I think you can put it together however you want, just make sure you've got great:
  • Bread
  • Tomatoes
  • Olive oil
  • Salt
  • Garlic 

Thursday, October 18, 2018

everything can be a pizza or flatbread

So you need lunch or dinner fast.  You look in the fridge and see an assortment of odds and ends and think - "Hey, that might make a good pizza/flatbread".  Using this technique described by Kenji Lopez-Alt, all you need is a 10" flour tortilla, a heavy skillet or frying pan and some toppings.  What did I have?  Cheese, some grilled eggplant (from last week's CSA), some grilled chicken and garlic confit in olive oil I'd made using this Vivian Howard recipe for a butterbean hummus I still need to make.

Technique:

Heat a skillet (cast iron or  I use a  ceramic non-stick) over medium high heat  and add 1-2 tsp of olive oil.  Pre-heat the broiler and adjust a rack to 6-8" below the broiler. Have all your toppings ready to go.  For this pizza, I used:

Large flour tortilla
Garlic confit in olive oil (see recipe above - used garlic from the CSA)
Chopped grilled eggplant (from last week's CSA)
Chopped grilled chicken
Mozarella cheese

For this, I used 1-2 tsp of the oil from the garlic confit to spread over the tortilla as "sauce".  
Once the oil in the skillet is smoking hot, use a paper towel to wipe the oil out of the pan, leaving a thin coating behind.  Drop in the tortilla, rough side down (oil side up!) and reduce heat to low.  Add your toppings (chopped confit garlic clove, eggplant and chicken) and cover w/ mozzarella.  Try to spread the cheese to the edge of the tortilla.  Put the plan under the broiler and heat for 2-4 minutes until the cheese is browned and bubbly.  Remove from oven and use a spatula to release the pizza from the pan - if it's not quite browned and crispy enough of the bottom, heat carefully over medium heat, swirling the pan.  Remove from pan to a cutting board, slice into pizza-style triangles or squares if you're a rebel and serve.


Adapt this technique to whatever ingredients you have on hand!


Tuesday, May 22, 2018

Slowly but surely...

Last night, pizza again.  I found this recipe for Kale Pizza here.  Since I had two big bunches of greens staring at me, along with a ball of premade pizza dough (from Saturday's post  - it gets better if it sits in the fridge for a couple of days, you can also freeze it) I thought this would be a good way to go.

The recipe is from Kenji Lopez-Alt of Serious Eats.  He's known for his meticulous work on developing recipes, sort of an Alton Brown meets Cook's Illustrated on steriods.  I had to adapt the recipe a bit, but the two main ideas I used were:
  1.  Pre-cook the pizza w/ cheese for about 5 minutes, then add the kale and cook for another 5-7 minutes.  This means the kale doesn't burn before the pizza cooks.
  2. Massage the roughly chopped kale for a few minutes with olive oil, salt and pepper to soften it up.
Kale Pizza  (adapted from Charred Kale Pizza with Garlic)
Ingredients
1/2 recipe of pizza dough (from this post)
4-7 oz  roughly chopped kale
3 tbs olive oil, divided
4 oz shredded mozzarella cheese (about 1 cup)
2 oz shredded gruyere cheese (about 1/2 cup)
2 cloves garlic
salt and pepper
  1.  Preheat oven with pizza stone on bottom rack to 500°F
  2. Remove the stems and roughly chop the kale (you'll have between 4-7 oz, about 5-8 cups).
  3. Put the kale in an salad spinner, wash w/ 2 changes of water and spin dry.
  4. Drizzle 1 tbs olive oil over the kale, season with salt and pepper, and massage/rub the kale until it is complete coated with oil.  Set aside.
  5. Peel and slice the garlic cloves thinly.  Place in a small bowl or ramekin that is microwave safe and add 2 tbs of olive oil.  Cook in the microwave for 30 seconds to soften garlic.
  6. Roll out pizza dough and place on a piece of parchment on a pizza peel.
  7. Use a pastry brush to brush the dough with the garlic olive oil (you don't need to use all of it!). Fish out the garlic pieces and sprinkle them over the dough.  
  8. Sprinkle the cheese over the dough
  9. Bake for 5 minutes.
  10. Using the peel, remove the pizza from the oven, discard parchment paper.  Sprinkle the kale over the pizza and put back in the oven for 5-7 more minutes until the kale is crispy on top.
I didn't take a bunch of pics but here are a few:
The massaged kale

The finished product

Overall it was very tasty, but there are a few things I'd do differently (other than take a better picture of the finished product!)
  1. Use more of the gruyere cheese, and reduce the amount of mozzarella.  As Kenji points out, the gruyere is really good with the kale.  
  2. Add more garlic, and add some of the red pepper flakes in Kenji's recipe.
So, how did we do on this weeks produce?
  • 3/4 pound salad mix  just a little bit left, enough for some salad today
  • 3/4 pound spicy salad mix (lots of arugula and other spicy greens) Used most of it for the pizza and pesto, I also tossed it into fritatas this week
  • 1/2 pound spinach
  • 1 pound kale
  • 1 pound collards
  • 1 bunch beets
  • 1 bunch carrots
  • 1 bunch turnips I've used about 1/2, but found out I like them cooked too.
  • 1 head lettuce (looks like butter lettuce) 
Left over from last week:
  •  2 green onions 
Not so worried about the beets, carrots and turnips, they'll keep, but I need to do a better job on the greens (also the beets and turnips come with their greens attached, so you can add those greens to the collards, kale and salads).  CSA pickup is today, so we'll see what's next! (I'm guessing more salad...)