Sunday, March 22, 2020

Re-Starting the blog - coronavirus edition

Well, that's not the best reason to start up again, but it is what it is.  The coronavirus has everyone trapped at home (or at least primarily working from home).  People are panic-buying meat, bread, juice, yogurt and of course, toilet paper. (what??). The Greensboro Farmer's Curb Market, where I usually get eggs and bread as well as vegetables, is suspended for the time being.  My friend and colleague Marlene Macauley had to essentially cancel the rest of her "bread and cheese" Sustainable Food Systems  class, so she shared some of her bread flour from Lindley Mills with us.  I plan to make a giant pot of soup tomorrow, and I want some toasted bread to go with it. So, finally, it's time to try out one of the "no-knead" bread recipes.   The version I used was from Food 52, and it came out pretty awesome.  Here you go:

The recipe: https://food52.com/recipes/21370-no-knead-country-loaf

What did it look like?  Let me take you through the steps..
Mixing it all together:

Lettin' it chill out for about 18 hours under the cool towel Rob brought me from the Matrurango Museum in Ridgecrest:
It'll look pretty knarly after 12-18:

Then, turn out the dough onto a floured surface and shape it into a ball:

Put the dough ball back on the towel (dust with flour), wrap it up loosely and let it rise another 2 hours.  During the last half hour of rising, put a 5 qt enamel cast iron dutch oven (Le Cruset is a common brand) in the oven and preheat to 475°F.  Once the oven is preheated, take the pot out of the oven, sprinkle the bottom of the pot with cornmeal or flour (I used cornmeal) and drop in the dough ball, seam side UP! Put on the cover, put it in the oven, and bake for 30 min.  Take off the cover, and bake another 10 min or so until golden brown and delicious:
Let it cool an hour or as long as you can stand and slice and eat:


Sunday, September 29, 2019

Hello!  Sorry it's been a bit.  If you are a reader, you're probably looking at me reproachfully like the Guilford Farm cats, Oliver and Katie:
(they did get some food).

What can I say?  It's been a busy month.  The part of teaching all of Organic Chemistry I from August 21-September 11 was especially busy.  But I've got a few things in my phone to share, and a giant backlog of hot peppers and okra I need to do something with.  But for today, let's talk about watermelon.  I made this a few weeks ago, but now I have another watermelon in this week's CSA so I'll be making it again soon.

I've cooked a lot from Vivian Howard's Deep Run Roots, which makes sense, since her book is organized around produce in North Carolina.  This recipe looks crazy, but I promise (just like like Vivian does) that it tastes great!   The recipe for Country Style Pork Ribs in Red Curry Braised Watermelon calls for "pork shoulder or blade steaks" which are just sliced up pork shoulder or "Boston Butt".  I have no idea why they are called "country style ribs" but it's good to know that's what those are, especially if you have a recipe that calls for 2-3 lbs of pork shoulder and the only pork shoulders you can find are the 6-10 lb behemoths at the grocery store.  This is easy to put together and delicious served over rice.

Ingredients

  • 1 tablespoon vegetable oil
  • 4 8-ounce pork shoulder or blade steaks
  • 3 teaspoons salt
  • 1 teaspoon black pepper
  • 2/3 cup red wine vinegar
  • 1/3 cup honey
  • 3 tablespoons red curry paste
  • 2 teaspoons fish sauce
  • 5 cups watermelon, cut into 1 1/2-inch cubes, seeds removed


First you need a watermelon:
Once you've got the rind off, chunk it up so you've got about 5 cups

Heat up the oil in a enameled cast iron dutch oven, and brown the ribs you've seasoned with salt and pepper:
Dump the watermelon on top, and add the rest of the ingredients that you've whisked together
Slap on the lid, slide it into a 350° oven and braise for 1 1/2 hours.  Then remove the lid and let it cook for 30 min more.  Serve over rice to soak up the broth.

Plated up with a little of Thai basil garnish:

Sunday, August 25, 2019

Thai Basil Pesto

So, while I'm on a pesto roll, I've got two huge Thai basil plants in my garden.  Thai basil has a great, anise-y smell that makes you crave a trip to Rearn Thai or similar.  This recipe is an oldie but a goodie - I haven't made it in awhile, but those plants were begging me to do something!  This recipe is from my friend Marlene, rockstar geologist and co-creator and coordinator of the Sustainable Food Systems major at Guilford College.  If you don't have overgrown Thai basil in your yard, it's easy to find at international markets like Super G.

Thai Basil Pesto
Ingredients
  • 1.5 cups Thai basil leaves, packed
  • 0.5 cups cilantro leaves, whole (get this at Super G too, so cheap!)
  • 0.5 cups peanut butter
  • 1 tbs fresh ginger root, grated
  • 3 cloves garlic coarsely chopped (from the CSA!)
  • 1 tbs brown sugar
  • 1 tsp chili garlic paste, more to taste (I subbed a habañero from the CSA basket)
  • 3 tbs lime juice
Directions
Put all the ingredients in a food processor, whiz it until smooth, stopping to scrape down the sides if necessary.

This is good on noodles, grilled salmon or shrimp.  I've also made a pizza with it, using this pesto as the base and adding shrimp and mozzarella but I haven't made that in a long time!  Need to change that.

Some pics!

All the ingredients in the food processor (I doubled the recipe)

Started out with only 1/2 habanero, added the other half after tasting for heat...proceed cautiously!

Ready for the freezer!

Saturday, August 24, 2019

Microgreens Pesto

The past few weeks we've been getting "microgreens" in the CSA basket.  I think they are radish sprouts?  Anyway,they are very peppery, a bit too peppery for me to eat on their own.  I thought they might make a good substitution for arugula in this  this arugula pesto recipe, which I've been making for awhile.  We really liked it on what we call a "salad pizza" and I"m sure it'd be good on grilled meat or fish as well.  The main change I made besides using the microgreens instead of arugula was to use pistachios instead of the pine nuts I usually use.  You can by a bag of them at Costco and they're good for snacks and salads, and work very nicely in this pesto.

Microgreens Pistachio Pesto (adapted from Arugula Pesto from Serious Eats)

Ingredients

1 cup packed microgreens
2 tbs shelled pistachio nuts (roasted and salted)
1/2 oz freshly grated parmesan cheese
2 medium garlic cloves, coarsely chopped
1 tsp lemon juice
2 1/2  tbs olive oil (a little more if you think it needs it)
Kosher salt and black pepper to taste

Instructions
 
Place all the ingredients except olive oil, salt and pepper in a food processor, and pulse until finely chopped, scraping down the bowl with a spatula as required. While the processor is running, add olive oil slowly to form a smooth paste.  Add additional olive oil if you like your pesto a little more loose.  Add salt and pepper to taste.

Can be frozen - I either use an ice cube tray or freeze it in 1/4 cup amounts in snack sized ziploc bags that I press flat and put in a quart freezer bag. The 1/4 amount is just right for a pizza.

This is easy to double if you've got an overabundance of greens.


Saturday, August 17, 2019

Esquites!

Hello, new readers!  (And hello to Stacey, Ara and Erin who I know have been reading for awhile!)  This week Nick and Will put the URL for this blog in the CSA note we get each week, so I thought I might have a few folks drop by to check it out.  If you're new here, I hope you find something useful to you.  I started this blog during summer 2019 because I thought it might be fun to track what I did with every single item in each weeks' CSA box, but that got to be a little much (really, you don't need to see every salad I eat).  What it has been good for, though is a place for me to keep track of new recipes I make with items from the CSA that I think are worth repeating and that others might be interested in.  Having that record helps me remember what I've made that turned out well, and also provides a good place to make a note of any changes I've made or pitfalls I ran into.

This past week I made esquites, which is a Mexican corn salad.  Even if we're not growing it at the Guilford College Farm, I do love corn season, and I could eat it on the cob every day.  Last week I had a version of this at a my friend Marlene's house and she rightfully pointed out that it was a lot easier to handle if you're serving a lot of folks than corn on the cob.  Or, I realized, if you're eating dinner on the sofa while watching TV (by the way, go check out Derry Girls on Netflix, it's hilarious!).

I found this recipe for esquites by Kenji Lopez-Alt on Serious Eats and adapted it a bit.

Ingredients
  • 3 cups fresh corn kernels (about 4-5 ears, I used bicolor corn from Rudd Farm at the Curb Market)
  • 1 tbs vegetable oil
  • Kosher salt
  • 2 tbs low fat mayonaise (Hellmans)
  • 2 oz Cotija cheese, grated 
  • 1/4 cup chopped chives (I didn't have scallions!)
  • 1/2 cup fresh cilantro, finely chopped
  • 1 jalepeño pepper, seeded and finely chopped <----THERE it is, the lone CSA ingredient!
  • 1 clove garlic, grated on a Microplane (oh, wait, that's from the CSA too)
  • 1 tbs fresh lime juice
  •  sprinkle of chili powder to taste
Directions
  1. Heat the oil in a large non-stick skillet of dutch oven (I used the latter) over high  heat.   Add corn kernels, season w/ salt to taste, and stir and toss occasionally (about 3-4 minutes) until corn is cooked and hopefully some of it is lightly browned.  Transfer to a large bowl. 
  2. Add the rest of the ingredients to the corn and stir to combine.  Adjust seasoning to taste.
Some pics!

Taking the corn off the cob (the bundt pan does a great job of holding the cob steady and catching the corn).

Mixing it up

Plated up w/ a BLT made with tomatoes from the CSA,  Marlene's homemade sourdough and our homemade bacon!

A nice change of pace from corn on the cob.


Tuesday, August 13, 2019

Enchiladas Verdes w/ homemade salsa verde

Last week we got tomatillos in the box, and I've had jalapeños from the last two boxes, so it was time to make some salsa verde and enchiladas verdes.

The Enchiladas Verdes recipe is adapted from a Cooking Light recipe from 1999.  It's also great w/ leftover rotisserie chicken and a jar of your favorite tomatillo salsa instead making your own.  It's easy to put together ahead of time, and makes good leftovers.

The salsa base is from Rick Bayless' Mexican Kitchen, and I've written about another tomatillo salsa from the same book here.  This is a simmered sauce, and one he recommends for enchiladas.  I made a double batch and froze half for enchiladas later (because I might have still had tomatillos from last week's CSA box).

Essential Simmered Tomatillo-Serrano Sauce (CSA ingredients are marked w/ an *)


*1 pound tomatillos, husked and rinsed
*Fresh serrano chiles to taste (3, 1/2 oz total - I ended up subbing two of the jalepeños from the CSA, they weighed about 1 oz and I took the seeds out of one of them after roasting.
1 tbs olive oil
1 medium yellow onion (6 oz) roughly chopped
*2 large garlic cloves, peeled and roughly chopped
2 cups chicken stock (you could probably sub water here to make it vegetarian, but we're making chicken enchiladas so...)
1/3 cup roughly chopped cilantro.

1.  Lay the tomatillos and chiles on a baking sheet and broil about 4" from the broiler for about 5 minutes a side.  The tomatillos and chiles should start to soften and blacken.  Transfer the vegetables and any accumulated juices to a blender or food processor.

2.  Heat 1/2 tbs of the olive oil in a 5 qt dutch oven over medium heat.  Add the onion and cook, stirring often, until deep golden, about 8 minutes. Add the garlic and cook and stir a minute longer.  Scrape the mixture into the blender or food processor. If your using a blender, take out the "stopper" in the cover and cover loosely w/ a kitchen towel while blending to prevent a massive cleanup of your kitchen becoming necessary.  Pulse the whatever your using a few times to reduce the vegetables to a rough puree.

3. Add 1/2 tbs of oil to the pot and heat over medium high.  When it's hot enough to sizzle when a drop of puree is placed in it, pour all of the puree in and stir constantly for 4 or 5 minutes.   The sauce base will reduce and become thicker and darker.  Stirr in the broth, return to a boil, reduce the heat to medium and simmer briskly until thick enough to coat the back of spoon, about 10 minutes.  Stir in cilantro and season to taste w/ salt.

Some pics!
The vegetables ready for their tan:

In the blender:

The "rough puree"

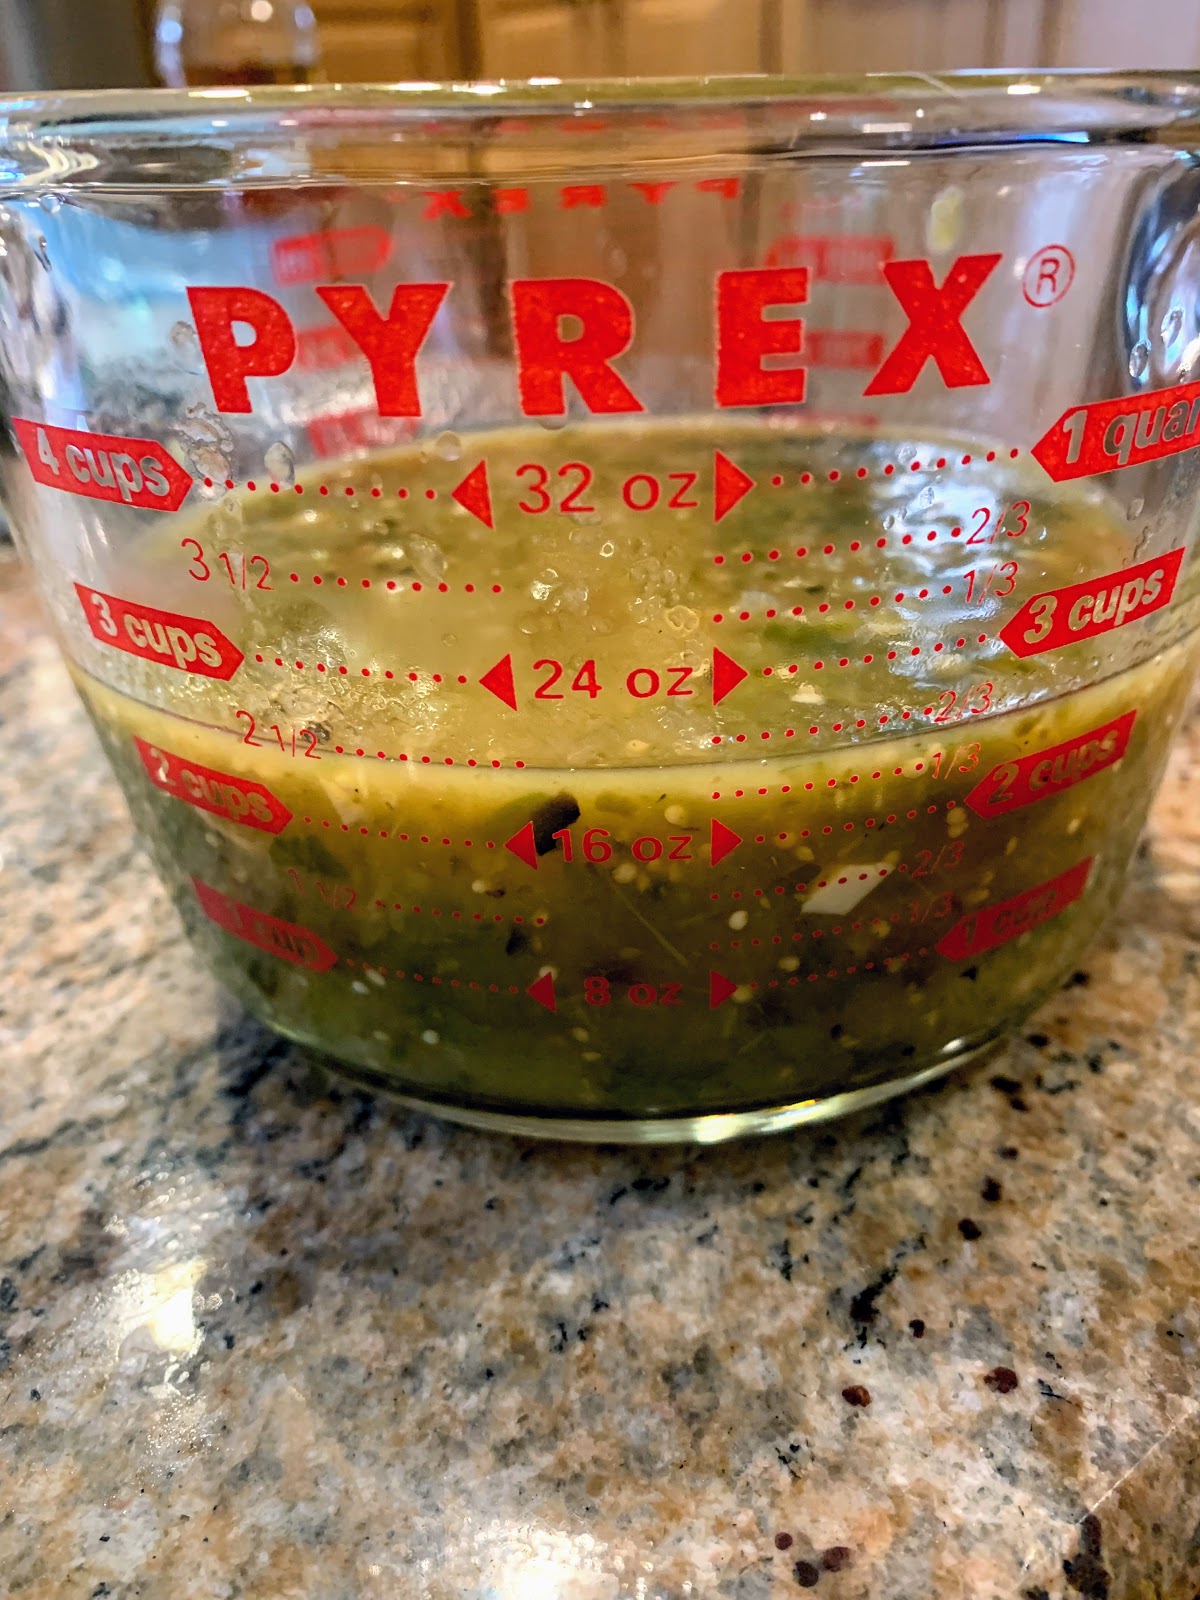
Final product, ready to go in the fridge to wait for enchilada assembly:

Enchiladas Verdes Adapted from Cooking Light

  1. 12 oz shredded cooked chicken (I usually use white meat, but whatever you like)
  2. 2 oz shredded asiago or asadero cheese (you could also substitute mexican shredded cheese blend if you can't find those)
  3. 1/3 cup finely chopped onion 
  4. 1/3 cup finely chopped cilantro
  5. 1/3 cup chicken broth (If I'm fancy and have planned ahead, homemade, butI will use bullion here, or Better than Bullion) 
  6. 1/3 cup low fat sour cream or greek yogurt
  7. 1 tbs fresh lime juice
  8. 1/2 tsp ground cumin
  9. 1/4 tsp salt
  10. 1/8 tsp black pepper
  11. 8-10 small corn tortillas
  12. 2 cups tomatillo salsa (a jar is fine if you don't want to mess with homemade, Harris Teeter has a good one)
  13. 1 oz shredded asiago or asadero cheese
  • Mix together the first 10 ingredients to make the filling.
  • Spray a 9"x13" baking dish with cooking spray,  and pour 1/2 cup salsa in the bottom and tilt to coast the bottom of the dish.
  • Heat each tortilla in a skillet or on a comal (I heat mine over a gas flame to get a little char), place the tortilla on a small plate, and scoop 1/3 cup filling down the middle of the tortilla, roll up and place seam side down.  Repeat w/ remaining tortillas until you run out of filling.
  • Pour remaining salsa over enchiladas.  
  • Sprinkle w/ remaining 1 oz cheese, cover w/ foil and bake at 400°F until thoroughly heated, about 20-30 minutes.

Some pics!
All the ingredients for the filling (some of the red onion from the CSA here!)
 Salsa in the dish

First enchilada off the assembly line
All enchilada-ed!

Time for dinner


Sunday, August 4, 2019

Homemade Bacon (who knew?)

My friend Marlene emailed me a couple of weeks ago w/ a link to this NY Times article (along with several others) asking "...want to try homemade bacon?"   I had several pork bellies in the freezer because of Marlene (she thought they were ribs from Ofuskee Farm, but they were bellies) and she also had pork bellies from PTB Farms (who I've mentioned before).  We each made up our own cure, riffing off of the NY Times recipe (I left out the coriander, thyme and fennel because they didn't seem like very "baconlike" ingredients to me) and several others from around the web.  Here's what I used:

Cure:
  • 2.5 Tbs kosher salt (Diamond Crystal)
  • 1/2 tsp pink salt (note: this is not himalayan pink salt!  It's pink salt w/ sodium nitrite for curing meats!)
  • 2 Tbs maple syrup
  • 2 Tbs honey
  • 2 Tbs cold black coffee
  • 2 garlic cloves, smashed (CSA ingredient, so it's legit to have bacon on the blog)
  • 1 Tbs black peppercorns, crushed (put them in a ziploc and hit 'em w/ a meat mallet a few times)
  • 2-2.5 lbs pork belly (I had 3 tiny bellies, ranging in size about 10-12 oz) 

 Instructions:
  1. Place the pork bellies in a Ziploc bag.
  2. Mix together the dry cure ingredients, add to bag
  3. Add wet cure ingredients, close the bag
  4. Massage the bag to coat the bellies with the cure ingredients as best you can
  5. Press most of the air out of the bag and place bag in fridge
  6. Flip the bag over and massage the cure into the meat 1x day for 7 days
  7. After 7 days, remove the bellies from the bag, and rinse the cure off of the meat.  Pat dry with paper towels, and place on a rack in the fridge to dry for 6-24 hours.
  8. Since my bellies were so small, I rolled and tied them at this point
  9. Smoke over applewood at 200-225°F for 1.5-2 hours until internal temperature is 150°F
Some before pics:
Ready to go into the smoker

Coming out of the smoker (we also had probe thermometers in two of the bellies while smoking so we knew when to pull them).

mmm...bacon


You could slice and eat it just like this, but we pan fried a few slices and then put some on parchment and stuck it in a 400°F oven to bake 8-12 minutes, keeping an eye on it and flipping it about every 3-5 minutes. 


Forgot to take an after pic.  Combined with Marlene's homemade sourdough sandwich bread, these gorgeous tomatoes from the CSA and some smoked corn mayonnaise from Deep Run Roots, it made some damn fine BLT's.  (which would also be damn fine w/ some Hellman's or Duke's and any good white sandwich bread).