Saturday, July 25, 2020

Pizza and greens

Pizza with greens is one of they ways I use up the avalanche of greens that hit us in the spring in the CSA.  I make "salad pizza", Kale Pizza and Spinach Pizza pretty regularly in those early weeks of the CSA.  As the greens slow down in the heat of the summer to make way for squash, tomatoes, eggplant, okra and peppers, I don't make it as much, or make pizza with other toppings from the CSA.  But hands down, I really think that pizza is one of the best ways to turn a mountain of greens into something delicious (pasta is a close second).  This week I was surprised w/a bunch of rainbow chard in the box, and while I've got a go-to pasta I make with chard, I wondered if I could give it the pizza treatment. It turned out pretty well! The only downside compared to the recipes linked above is that I had to cook the chard for a bit before it went on the pizza, so, pans to wash.  I might try this with bacon instead of pancetta next time chard appears in my box.  For the dough I use a recipe from Mark Bittmann that comes together fast in the food processor and freezes well.  I've recently adapted it to use a sourdough starter rather than yeast, in light of the fact that I haven't seen yeast at my local Harris Teeter since March!  I'll post that later, but until then both Trader Joes and Harris Teeter will happily sell you a ball of pizza dough, andthose also freeze well.

Chard Pizza (adapted from this recipe for White Pizza with Chard and Caramelized Onions, plus all the other pizza recipes linked above!)

Ingredients
  • 1 ball pizza dough (12-16 oz Note: My recipe makes 2 12-oz balls, what you buy at the store is usually 1 lb)
  • 4 oz pancetta, chopped
  • 1 bunch rainbow or swiss chard, stems cut off and discard and leaves roughly chopped ( usually roll up a few and cut them crosswise into strips about 1" wide)
  • 1 garlic clove, minced
  • 1 onion, cut in half through the root and thinly sliced crosswise
  • 2-3 garlic cloves, peeled and sliced thin
  • 1-2 tbs olive oil 
  • 1 tsp red pepper flakes (optional)
  • 3 oz shredded gruyere 
  • 2 oz shredded mozzarella (you could sub all mozzarella if you don't have gruyere)  
Directions 
  • Preheat oven to 500°F (preferably with pizza stone, if you don't have one you could use a baking sheet, adjust cooking time as necessary)
  • Heat a 10-12" skillet over medium heat, add chopped pancetta and 1/2 cup water.  As the water heats it will help render some of the fat out of the pancetta, and then as the water evaporates the pancetta can continue to crisp up in the rendered fat. Once the pancetta is lightly browned, remove it from the pan and drain on a paper towel, leaving the fat in the skillet.
  • Drain all but 1-2 tsp fat from the pan (reserve the rest), add chard and minced garlic and cook over medium heat for 2-3 minutes until wilted, remove from pan.
  • Add 1-2 tsp reserved fat (or olive oil) to the pan, add sliced onions, reduce heat to low.  Cover and cook, stirring occasionally for 20-25 minutes until onions are tender and caramelized (Note: if all the moisture evaporates and the onions start to stick or burn, you can add a little water).
  • Place sliced garlic in a small microwave safe bowl, add 2 tbs of olive oil and microwave for 30 seconds.
  • Roll out pizza dough into a circle, place on parchment paper on top of pizza peel.
  • Brush pizza dough with garlic oil (you don't need to use all of it!), fish out pieces of garlic from the oil and sprinkle them over the dough.  Sprinkle the red pepper flakes over the dough.
  • Spread cheeses evenly over dough
  • Spread 1/2 crisped pancetta over dough (you could use all of it, this was just all I wanted)
  • Spread cooked chard over dough, then onions.
  • Slide pizza w/ parchment onto pizza stone.  Bake 5 minutes.
  • Remove parchment paper (pizza will now be sitting directly on stone).  Bake another 5-7 minutes until crust is lightly browned.
  • Slice and eat!
Some pics!
The chard:


So, ok, I'm terrible at taking photos while cooking, but at least I remembered the final product:


Sunday, July 19, 2020

Cool as a cucumber

So it's hotter (and humider) than heck outside, so here's a nice cool recipe courtesy of Smitten Kitchen, Takeout-Style Sesame Noodles with Cucumber.  Cold noodles are heaven when it's a furnace outside. I added some cold poached chicken for some extra protein, and the recipe made enough for dinner for two and at least two lunches for me.  I made it pretty much as written, but made a few mods:
  1. I did not have Chinese sesame paste so used regular tahini
  2. I did not have Chinese rice vinegar so I used regular rice wine vinegar (unseasoned).  I want to find the Chinese rice vinegar as I've read it has a stronger taste - Super G here I come!
  3. I added Thai basil to the mint and cilantro suggested for the chopped fresh herbs garnish.  I could have added even more.  
  4. As I mentioned above, I added about 3 oz of cold poached chicken, sliced to each serving.  You could also use shredded leftover rotisserie chicken.  I bet some cold boiled/poached shrimp would be good too.
I used the same "rice sticks" Deb describes in her post (like what you might use for pad thai) which I've always struggled with cooking - they're either underdone or overdone and stuck together in a gluey ball.  I think I found a method that works well for me:  Place the rice sticks in a large bowl.  Bring enough water to boil to cover the rice sticks, and pour over.  Let the rice sticks soak 8-10 minutes, testing starting at 7 minutes or so for doneness.  Once they're done, drain the water and rinse w/ cold water to cool.  I even threw a couple of ice cubes in there to help cool down the noodles faster. Perfect and  I didn't even need to add the extra sesame oil to keep them from sticking.

I bet this would be good with soba noodles too!


Penne with Prosciutto, Tomatoes and Zucchini

This week the tomatoes continued, but we are now starting to see some summer squash as well.  This weeks' CSA bag had:

  • 1 bunch carrots
  • 1 lb cucumber
  • 3 small peppers
  • 2 lbs beets <--- this is a project I need to work on!
  • 1 lb zuchinni (I got two small green and one medium yellow)
  • 2 jalapeños
  • 1/2 lb tiny tomatillos
  • 1 bunch cilantro (check out the last post)
  • 1 basil plant
  • 1 pint cherry tomatoes
I wanted to make dinner last night using items in the bag and in the house, I settled on combining and modifying slightly two different recipes, one called "Penne with Prosciutto, Tomatoes and Zucchini" from a blog called "Jo Cooks" and the other called "Cherry Tomato Pasta With Proscuitto and Asiago" from Cooking Light.  Here's what I used:

Ingredients (serves 2 generously)
  • 6 oz penne pasta
  • 3 oz proscuitto, roughly chopped (6 slices)
  • 1 tbs olive oil
  • one onion, chopped
  • 5 cloves garlic, peeled and minced
  • 1/4 tsp red pepper flakes
  • 1 medium zucchinni, quartered lengthwise and sliced (I used the two tiny green ones I got)
  • 12 oz cherry tomatoes, halved
  • kosher salt to taste (about 1/4 tsp)
  • ground pepper to taste
  • 2 tsp balsamic vinegar
  • 1 oz parmesan cheese, grated
  • handful fresh basil, chopped
 Instructions:
  •  Cook pasta according to package directions, drain and reserve
  • Heat 1 tablespoon oil in a large skillet over medium-high heat. 
  • Add prosciutto; cook 3 minutes or until crisp. Remove prosciutto from pan, reserving fat. Place crisped proscuitto on a paper towel lined plate to absorb fat.  If there is not at least 2 tsp of fat left in the pan, add 2 tsp olive oil.
  • Add onion, sauté 4 minutes until softened
  • Add zucchini, garlic, and pepper, cook 1 minute. 
  • Add tomatoes and salt; cook 3 minutes.
  • Stir in pasta and vinegar; cook 30 seconds. 
  • Remove pan from heat; stir in chopped basil
  • Divide pasta mixture among 2 bowls; top with prosciutto and sprinkle the parmesan over the two bowls. 
  • Sprinkle with additional chopped basil 
This was pretty good, but next time I make it I might replace the proscuitto with sweet Italian sausage.

Some pics!
Line up your ingredients:
Saute those veggies:
Forgot to take pics of adding the tomatoes, but here it is plated up:

Monday, July 6, 2020

Cilantro - do you hate it?

How do you feel about cilantro?  The first time I had it I thought I was licking a bar of soap.  The the next time, I was all "this is yummy!".  Don't know what happened there.  I had exactly the opposite reaction with a Japanese herb called shiso. Liked it then hated it. So while I'm happy to see a bundle of cilantro show up in the CSA the last two weeks, I'm hoping Nick doesn't start growing shiso on the farm!

A few things with cilantro I've made before:
And here are a couple of new things, one with pics and one without, cuz I was hungry.

Guacamole
Note: this is a starting point, adjust ingredients to your taste
1 large ripe avocado (like the ones in the bag at Costco) or 2 small (like the ones in the tiny bag at HT)
1 handful chopped ripe tomato
1 handful chopped onion
1 handful cilantro. chopped
juice from 1/2 lime
1 serrano or 1/2 jalepeño (if it's one of those monster ones!), finely chopped, or a few dashes of hot sauce such as Tapatio
salt and pepper to taste

 Mash avocado in bowl w/ fork or potato masher.  Add the rest of the ingrdients, stir, taste and adjust salt, pepper and hot sauce to your liking.  Serve w/ tortilla chips on tacos or quesadillas, or, just go at it with a spoon.

Some pics!
Avocado ready to be smashed:
Getting to smashing with my tiny potato masher:
Add the rest of the ingredients:
Mix it up:
Needs moar Tapatío:

Thursday, July 2, 2020

Orange you glad I didn't say...carrot?

Knock, knock!
Who's there?
Carrot.
Carrot who?
Knock knock
Who's there?
Carrot.
Carrot who?
Knock knock
Who's there?
Orange.
Orange who?
Orange you glad I didn't say carrot?
 I might have a problem:
Yes, I've been letting the carrots accumulate.  Here's a few things I've made:
On repeat-
Chicken Soba Salad- nice, cool, low cook dinner for those 90° days.
Also-
Pickled Carrots -these are great to give a little kick to anything, but especially nice on avocado toast.

New recipe!  From my food blogging boyfriend David Lebovitz (not to be confused with my basketball boyfriend or my curriculum boyfriend - both are long stories) - salade de carottes râpées, or grated carrot salad, which is apparently a thing in France, and  that I look forward to trying in situ should I ever be allowed to travel to the EU again. Or travel.  Sigh.  This is very nice on its own, or with a bit of diced chicken for lunch.  Apparently you can also add some shredded beets, which is good news (eyes the piles of CSA beets in the crisper).

Grated Carrot Salad 
1 pound (450g) carrots, peeled 
2 tablespoons extra-virgin olive oil 
1 tablespoon freshly squeezed lemon juice, or more, to taste 
1/2 teaspoon kosher 
1/2 teaspoon Dijon mustard 
1/4 teaspoon honey or sugar 
1 1/2 to 2 tablespoons finely chopped fresh herbs, such as parsley, tarragon, chives,or chervil (yum, tarragon!) 

Procedure  
1. Grate the carrots on a box grater or you can use a spiralizer (this is fun, like sharpening a lot of carrot pencils).
2. In a mixing bowl, stir together the olive oil, 1 tablespoon lemon juice, salt, mustard, and honey or sugar. Add the carrots and chopped herbs and toss thoroughly with the dressing.
3. Taste, and season with additional lemon juice, salt, or other ingredients.
 Some pics! Nothing to exciting, just giving you a sense of the size of the shred with the box grater. The spiralizer  makes a larger carrot strip.


Sunday, June 14, 2020

I've made a few things..

What have I made over the past few weeks?
Here's the week 5 basket:
What all did we get?
  • carrots
  • beets (I've got to do something with all of these I'm accumulating!)
  • kale
  • fennel bulb w/ fronds
  • rainbow chard
  • cucumbers
  • garlic scapes
  • two heads lettuce (hidden under the fennel)
  • a tomato!
The week 6 basket I forgot to take a picture of, but the Guilford College Farm posted one on Instagram so here's a link.  You should follow them @guilford_college_farm on the 'gram.  What was in it?
  • carrots
  • beets (I have a problem here)
  • fennel bulb (the fronds were not quite as nice on this one so I tossed them
  • collard greens
  • cucumbers
  • garlic scapes
  • two heads lettuce
  • pt cherry tomatoes (several types)
  • 2 tomatoes!
 So there are some salads, gazpacho and beets (roasted and pickled) my future.

A few things I've made recently, from least complicated to most:

Grilled Garlic Scapes
Put garlic scapes in a 1 gallon ziplock bag (you may need to cut them in half).  Add a bit of olive oil, salt and pepper to taste and shake/massage the bag until the scapes are evenly coated.  Grill 5-10 minutes until a bit charred.  Serve as a side (like asaparagus) or how ever you like.
Tzatziki (cucumber yogurt sauce)

Ingredients:
  • Cucumber, shredded and squeezed dry in a clean dish towel)
  • Greek yogurt (I usually use 2%)
  • 1small garlic clove, pressed
  • 1-2 tsp lemon juice
  • salt and pepper to taste
 Peel the cucumber (or not, I usually don't) and shred using the coarse holes on a box grater.  Pile cucumber in a clean dish towel, wrap up and squeeze to get out as much moisture as possible.  Place cucumber in bowl, and add greek yogurt to roughly equal the amount of cucumber (this is usually about 1/2 - 1 cup cucumber to 1/2-1 cup yogurt).  Stir to mix.  Press a clove of garlic into the mixture (or grate it in w/ a microplane).  Add 1-2 tsp of lemon juice, mix.  Season with salt and pepper to taste.

Hey, remember that head of red cabbage from a few weeks ago?  I finally got around to doing something with it!
Crispy Braised Chicken Thighs with Cabbage and Bacon (adapted from Serious Eats)
Ingredients:
    2 pounds bone-in, skin-on chicken thighs (4 thighs; 1.15kg)
    Kosher salt and freshly ground black pepper
    4 ounces chopped pancetta
    1 medium onion, thinly sliced (about 6 ounces; 170g)
    1 pound finely shredded cabbage (about 1 medium head; 450g - I used red cabbage here)
    2 tablespoons (30ml) whole grain mustard
    1/2 cup (120ml) apple cider vinegar
    3 cups (700ml) homemade or store-bought low-sodium chicken stock
    3 tablespoons sugar
    2 bay leaves
    6 sprigs thyme
One of the ways I adapted this was to substitute pancetta for the bacon called for, and to use less of it. I also didn't use any of the oil or butter called for, because between the pancetta and the chicken there is plenty of fat in this dish.

Directions
  1.  Pre-heat oven to 350°F
  2. Season chicken with salt and pepper, set aside (even better if you can do it the day before)
  3. In a 5 qt cast iron dutch oven, heat 1/2 cup water and pancetta over medium heat.  As water evaporates, fat will render.  Cook until pancetta is browned (about 5-10 min?).  Remove pancetta from pan w/ a slotted spoon, leaving fat behind.  Remove (pour or spoon out) fat until there is only 1-2 tbs remaining in the pan. 
  4. Place chicken skin side down in the pan. Cook without moving about 8 minutes until skin is crisp (reduce heat if it starts smoking).  Flip over chicken and brown on opposite side, about 3 minutes.  Remove chicken to a large platter or plate and set aside.
  5.  Add onion to pan and cook about 4 minutes, until softened and starting to brown.  Add cabbage to pan and cook about 4 minutes, until softened and starting to brown.  Add mustard and vinegar and cook, stirring and scraping up browned bits from bottom of pan. Add chicken stock, sugar, bay leaves, browned pancetta and thyme sprigs and bring to a simmer.
  6. Nestle chicken back into the pan, leaving the skin above the liquid but submerging most of the meat. Transfer pan to oven and cook, uncovered, until chicken is totally tender and liquid has reduced by about half, about 45 minutes.
  7. Remove from oven and transfer chicken to a serving platter. Season cabbage mixture to taste with salt and pepper. Serve immediately, spooning cabbage and sauce into shallow bowls and topping with chicken.

    I also served this with some mashed potatoes to soak up the juices.  Some pics!

    The browned pancetta
    Cooking the chicken

    Cooking the onions


    Cooking the cabbage


    Ready to go in the oven

    All done

    Plated up!


Wednesday, June 3, 2020

Lettuce suppose...

...that you have too much lettuce.  Apparently one of the top searches on Google this time of year is about using up all the lettuce in your CSA.  I have a folder of "CSA ideas on my computer, and I was looking through them and found this recipe from Mark Bittman "Pasta with Proscuitto and Lettuce" that I'd saved a few years ago but never tried (I have experimented with a lettuce soup).  With a couple of heads of lettuce and a pound of salad greens sitting in my fridge, I figured it was time to give it a try.  And I liked it!  You can pretty much use up a whole head of lettuce in one serving, thanks to the power of wilting greens with heat.  I bet you could even make this vegetarian by replacing the crisped proscuitto with some mushroom "bacon" that I've seen recipes for.  This is adapted from Bittman's recipe to serve one, now that I'm home all the time and can cook lunch.

Ingredients:
  • 1 tsp olive oil, divided
  • 1 tsp butter
  • 2 slices (about 1 oz) proscuitto, sliced crosswise into 1/2" strips
  • 2 oz pasta (I think flat-ish shapes work well here, like farfalle orrecchiette, but use what you have)
  • 2 tbs minced shallot (a good sub from the CSA would be a couple of chopped garlic scapes)
  • as much lettuce as you can stand (I've been using the heads of lettuce that we're getting from the CSA), sliced into ribbons (about 1/2")
  • 1/2 cup frozen peas
  • 2 tbs white wine, chicken stock or water (I used wine)
  • 1 oz grated parmesan
Procedure:
  1. Cook pasta until al dente, drain and reserve.
  2. While pasta is cooking, heat a 10" skillet over medium heat, add 1/2 tsp olive oil. 
  3. Add proscuitto, saute until slightly browned and crisp.  Remove from pan and reserve.
  4. Melt butter and remaining 1/2 tsp oil over medium heat
  5. Add minced shallot, sprinkle w/ salt and pepper saute until tender ( 5-10 min)
  6. Add liquid (stock, water  or wine) lettuce and peas,  cook until lettuce is wilted and peas are bright green, about 5 min.
  7. Add cooked pasta and 3/4 oz of parmesan to pan, stir and toss to mix together
  8. Put in bowl, garnish w/ remaining parmesan and the proscuitto.
Some pics!
Your mise:

crisped proscuitto:
Add the lettuce
Plated up!
Also, Black Lives Matter.  Educate  yourselves.  Be part of the solution.

Saturday, May 30, 2020

Greens Tacos

I've made collard greens tacos before, using this recipe from Serious Eats.  With two weeks worth of collards sitting in fridge, I needed to do something.  Forgetting I'd already made tacos with greens before, I searched and found almost the identical recipe at Rick Bayless' web site, which also comes along with a little video for "taco Tuesday" showing Rick making the recipe.  You can use any kind of greens in the recipe, the only thing that will vary is the cooking time for the greens.  I needed to cook the collards for about 25-30 minutes to get them to the tenderness I like, but you do you.

Collard Green Taco Filling

Ingredients
  • 1 large onion (I used a vidalia), halved through the root and sliced thinly crosswise
  • 1 lb clean, chopped collard greens (yield from two bunches - last week's was a little bigger than this weeks)
  • 6 cloves garlic, peeled and chopped
  • 1 tbs olive oil
  • 1 tsp red chile flakes
  • 3/4 cup chicken broth, vegetable broth or water (I used chicken broth)
  • salt and pepper to taste
Procedure
Heat olive oil over medium heat in 5-qt non-stick dutch oven. Add onion, a sprinkle of salt and saute for about 20 minutes until caramelized (you may need to reduce the heat the heat to low).  Add chopped garlic and chile flakes to pan, and stir around for about 30 sec (until you can smell the garlic).  Increase heat to medium high, add 3/4 cup of broth, and the greens.  Let the greens wilt down, and when the broth comes to a simmer, reduce heat to low, cover and cook, stirring occasionally until the greens are done to your liking (about 30 minutes for collards).  Remove lid and let most of the remaining liquid evaporate.

To serve, place a scoop of greens into a warmed corn tortilla (I warm mine over a gas flame) sprinkle with queso fresco.  Add salsa if you like, the Serious Eats recipe linked above has a recipe for a chipotle salsa that's pretty easy.  I also like to mix the greens with scrambled eggs for a breakfast taco.

Some pics!
onions

onions cooked down, adding the garlic and chile flakes

adding the greens


all cooked


Friday, May 29, 2020

Steak Noodles

I thought I had posted this before, but a search tells me no.  So there's not much with respect to pics, because I thought I'd already posted them.  The key ingredients here are 9-12 ounces of steak, a package of noodles and 3-4 cups of some kind of brassica.  I've used cabbage, broccoli slaw, and most recently, julienned kohlrabi.This is an adaptation of a Cooking Light recipe from 1998.  I've made it a million times, using, as I said broccoli slaw or cabbage (or kohlrabi) for the greens.  They quit making the noodles that are called for in the recipe, but I started using these and they work just fine, but I have to order them from Amazon. That's a bit problematic for me right now, but at least
Rudy gets a box to hang in.  Since I'm not using the original ramen noodles called for in the recipe, I make my own sauce, using 1/4 cup Memmi soup base diluted to 1.5 cups with water, a crushed garlic clove or 2, and some grated fresh ginger (keeps in your freezer oh so nicely) and a couple of tsp of siracha or gochuchang.

Steak Noodles (2 servings)
Ingredients:
  • 1 (10-12-ounce) rib-eye steak, sliced very thin
  • 1 teaspoon sesame oil
  • 1 cup chopped onion
  • 3-4 cups shredded cabbage or kohlrabi
  • 1 package chuka soba noodles
  • 1 1/2 cups water
  • 1 tablespoon soy sauce
  • 1/4 cup memmi (You can find this a Super G)
  •  1-2 garlic cloves, crushed
  • grated ginger (1-2 tsp) 
  • hot sauce (1-2 tsp siracha or gochuchang)
Directions:
  • Heat a non-stick pan (I use a 5 qt dutch oven) over medium heat.  Add steak in  batches, browning lightly on both sides.  Remove from pan and reserve.
  • Add sesame oil to pan, followed by chopped onion, saute 3-5 minutes until translucent.
  • Add 0.25 cups memmi to a measuring cup, along with 1 tbs soy sauce, dilute to 1.5 cups.   Add grated ginger and hot sauce. 
  • Break up noodles and add to pan.  Add water/memmi/soy/hot sauce mixture.  Stir and simmer until all the liquid is absorbed. 
  • Once most of the liquid is absorbed, add greens (cabbage or kohlrabi) and saute a bit.  
  • Add reserved steak.  Stir about a bit and then plate up.

Some pics? Actually I only have one of this week's CSA, but it's pretty gorge:


 What's in it? 
1 lb salad mix
1 head oak leaf lettuce
1 bunch carrots
1 bunch mustard greens
1 kohlrabi (featured)
1 bunch collards
1 bunch salad turnips
1 bunch garlic scapes

Stay tuned for a week of salad...

Thursday, May 28, 2020

Week 2 and 3- lots of repeats and one new recipe


Got behind a little bit, but here's what's been in the CSA the past two weeks
Week 2: May 16, 2020


  • 1 lb salad mix'
  • 1 head lettuce
  • 1 bunch carrots (tip: cut the greens off the carrots when you get them home.  You can use the greens like parsley, and the carrots won't go soft)
  • 1 bunch kale
  • 1 bunch collards
  • 1 kohlrabi
  • 1/2 lb spinach


Week 3: May 22, 2020

  • 1 lb spicy mustard mix
  • 2 heads lettuce
  • 1 lb swiss/rainbow chard
  • 1 buch radish
  • 1 cabbage
  • 2 cucumbers
  • microgreens
I've cooked a number of things over the past two weeks, and almost managed to eat all the salad.  Fortunately since the lettuce we get from the farm is so fresh, it really keeps well.  I know I'm on lettuce overload right now, but I also know I'll miss it later this summer.

Haven't made too much new recently, but here are some good recipes I've repeated:
One new recipe I made with the carrots was Lemon Rosemary Chicken Thighs with Vegetables

It was pretty good.  I used the recipe as a starting point, and modified it a bit.  You need:
  • 3 tablespoons olive oil
  •  2 tablespoons chopped fresh rosemary
  • 4 large garlic cloves, pressed through garlic press or finely chopped
  •  Juice of 2 lemons
  • 1 teaspoon kosher salt (Diamond Crystal)
  • 1/2 teaspoon freshly ground Black Pepper
  • 2 lbs bone in skin on chicken thighs (this was 4 for me)
  • 1 bunch carrots, peeled and cut into relatively uniform pieces (about the size of the "baby carrots" you see at the grocery store).
  • 1 lb yukon gold potatoes, cut into roughly 1" chunks (I did not peel them)
  • 1 vidalia onion (or other sweet onion) cut into roughly 1" chunks
If you have time, season the chicken thighs w/ 1-2 tsp salt and store in the fridge overnight.

Preheat oven to 425°F (I used the convection feature on my oven)  Cover a sheet pan with Al foil and spray with olive oil.  Whisk together the first six ingredients ( olive oil through pepper).  Add the rest of the ingredients, tossing well to coat. Spread everything out on the sheet pan, making sure the vegetables are in one layer and the chicken thighs are skin side up.  Roast for 40 minutes, checking the chicken with an instant-read thermometer to make sure it's at least 165°F.

Still have the cabbage, cucumbers and kohlrabi to use up!


Monday, May 25, 2020

Asian Chicken Salad/Wraps

Wut?  I haven't posted this yet?  A quick search tell me no.  So for folks trying to use up all the salad greens we're getting in the CSA right now, this is for you. This is one of my favorite recipes.  It's designed to be eaten as "lettuce wraps" ala PF Changs (or Phoenix Asian Cuisine if you'd like to go local) but I find that the lettuce wraps fall apart so I just like to serve it as a salad.

Skinnytaste has some amazing recipes, and this is one: https://www.skinnytaste.com/asian-chicken-lettuce-wraps/

I almost always make it with 2x the chicken called for as well as extra mushroom. Multiply the sauces accordingly.   I've also used excess water chestnuts (because what the heck are you going to use with the rest of the can?) as well as more mushroom.  In addition to having used more dried shitake than might be called for, I've also used a good amount of fresh, especially if available through the CSA.  But really, this recipe is all about using up the lettuce.

You'll need to make a trip to Super G to get all the different ingredients, but once you have them, they last FOREVER in your fridge.  I substitute korean gochuchang for the "white pepper" called for in the main recipe, and the same for the sauce (or siracha if you don't want to try and dissolve the gochuchang).

 So, long story short, the easiest way to do this is to cook up the chicken after marinating in all the sauces/spices, chop up the lettuce, and scatter the former over the latter (with a few good spoonfuls of rice).  And then add a good drizzle of sauce, with extra siracha or hoisin as you like.  Eat it up.

Here's a pic:


Friday, May 15, 2020

And we're back with the CSA for 2020!

Something has to go well in 2020, right?  For right now, we've got 25 weeks of the Guilford College Farm CSA to look forward to.  Last week was the first week, but I had this little biochemistry class in 3-weeks thing going on, so I didn't get a chance to post.  So here's the beauty shot:

What all did we have?  '
1 lb salad mix
1 bunch golden and red beets with greens
1/2 lb arugula
1 bunch mustard greens
1/2 lb spinach
1.5 lb cornmeal

An excellent start!  I did manage to use everything last week, except for the beets and the cornmeal, but they'll both keep.  I gave 1/2 lb of the salad greens to one of my students.  What did I make?
Some "classics" like Crispy Spinach Pizza (subbed some dodgy Manchego in our fridge for the romano), Salad Pizza with arugula pesto and, well, just salad with grilled pork tenderloin, veggies and this Zesty Buttermilk Avocado Dressing.


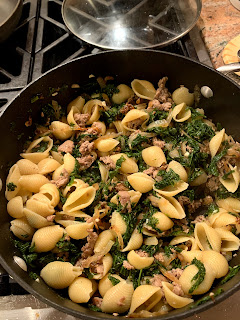
The new recipe I made was with the mustard greens, so if you've got the 1/2 share the week of May 15, this is for you, cuz' y'all got the mustard greens this week. Of course there are a million recipes for pasta, sausage and greens out there, and I adapted this one from a blog by nutrionist Rachel Hartley, but don't let that scare you. The sweetness of the onions goes well with the mustard greens.  You could use sweet italian sausage, or leave out the meat all together.

Mustard Green and Sausage Orrechiette (4 servings, 2 dinner and 2 lunch)
Ingredients:
1 lb turkey Italian sausage (hot), removed from casings
8 oz dried orrechiette pasta (mine was from HT)
2 medium Vidalia (or other sweet) onions, cut in half through the root and thinly slice crosswise
2 cloves garlic, peeled and chopped.
1/2 cup chicken stock (better than bullion to the rescue)
8-10 ounces mustard greens, large stems removed, roughly chopped (this is about what I got out of the bunch I got in the CSA)
Grated parmigiano reggiano to taste (1-2 oz per serving)

Directions:
  1. Cook the pasta in a pot of boiling salted water according to directions on package until al dente. Drain, reserving starchy pasta water.
  2. Brown sausage - drain and reserve a few tsp of fat.
  3. While waiting for the pasta water to boil, heat 2 tsp of olive oil (or reserved fat from sausage) in a large non-stick skillet (12") or dutch oven (5 qt, this is what I used) add onion and cook 3-5 minutes until translucent.  Add garlic and cook another minute. Remove from pan and reserve.
  4. Add broth to pan, scraping up any browned bits.
  5. Add mustard greens to pan, cover as they wilt down and cook 6-10 minutes until desired tenderness (you may need to add a little water).  
  6. Add sausage, onion mixture  and pasta to pan, and stir in some of the pasta water to make a sauce (1/2 cup or so?).  
  7. Serve w/ generous grating of parmigiano reggiano.
Some pics!
Sliced onions sauteeing:

 Prepping ingredients ingredients:
 Cooking the snausage:
 Greens and pasta ready to go:


Putting it all together:


 Plated up!

Ooops.  Forgot.  It was delicious.


Sunday, April 12, 2020

Happy Easter!

On Easter I like to make lamb.  I'd really like to make some amazing Enno Farms lamb, but this year we had to make do w/ a boneless leg of lamb from Harris Teeter.

For lamb, I adapt a recipe my mom made for many years - it was published in the "Heritage of Hospitality" cookbook, a Junior League cookbook published in 1975 and the first cookbook I ever owned:

The things that I keep the same: the amount of red wine.  Everything else, I amp up.  Two cloves of garlic?  No-  three or four!  1/8 teaspoon herbs?  No, handfuls of chopped fresh herbs, what ever you've got, but hopefully rosemary, oregano and thyme. 1/2 tsp worchestershire - what even is that?  A few glugs from the bottle.  A tbs or two of olive oil, not 1/2 cup.  I don't know why 1970's cookbooks were so afraid of spices  - and earlier ones - you can find recipes for spaghetti sauce in 1950's cookbooks that call for 1/8 teaspoon dried basil - you might as well just think about basil while you are making the sauce.

To cook, I light a chimney of charcoal and let it get white hot, pour it out on one side of the grill and cook the lamb leg over it until it's browned on both sides (about 5-10  min stop when it starts flaring up) then move it over to the cool side of the grill and cook until a thermometer tells me it's about 125°F in the thickest parts. Take off and let rest.

To serve with it I make this chimichurri from Serious Eats (I add 1/2 the amount of olive oil and whiz everything up in the blender or food processor).  I also make this potatoes gratin from Food52 (I use 2% milk and salted butter, it's fine) and finally grill up some asparagus tossed in olive oil, salt and pepper because it's the season.


Happy Easter!